
Forum Replies Created
-
AuthorPosts
-
in reply to: PVC Kids Bow Build-Along #133249
Step 6- Repeat for the other limb. When the first limb was formed, there was no orientation to the bow yet. After you heat up the other side, make sure the already formed limb is belly up.
Once you have formed both limb tapers, you will have something that is beginning to look like a bow. Feel free to flex it and see how it bends. Look down the bow and see how straight it is, tip to tip. It will likely be a little bendy through the handle. That’s ok, it will get fixed later. At this point, we want to keep the limbs as straight as possible, even if they don’t align with each other.
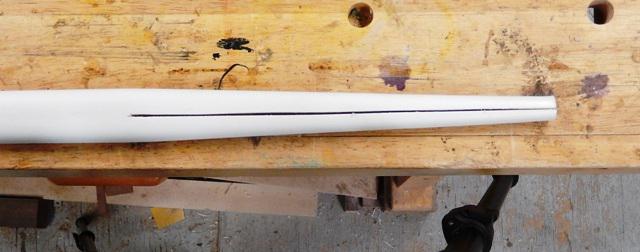
Step 6- Cut the taper wedge out of the limb. What we’re going to do now is finish out the tips of the bow by tapering the limb side to side. In the following picture, I have marked a triangular wedge that will get cut out. The wedge point is 10 inches deep into the bow and the base of the wedge is marked about 1/4 inch from each side.

Generally I use my bandsaw to cut the wedge out. I have cut plenty with a handsaw too. When I make bows with kids, I let them use the handsaw. It does just as fine a job, if not better. The width of the handsaw helps to keep the cuts straight. A hacksaw will not work as the frame of the saw is not as deep as the cut and will hang up.
Once the wedge has been cut, I clean the edges of the cut with a knife to remove any debris that’s holding on.
Step 7- Close the wedge. Using our trusty heat gun, we will heat the area around the point of the wedge just enough to allow us to close the wedge and form a nice taper. These heat guns are designed to sit on their ends and point straight up. Set your heat gun like so, so that you can work on your bow limb with both hands. Heat the sides a little more than the back and belly. It takes a while for the heat to transfer through the PVC, so go slow. Apply a little heat, see if you can close the wedge, a little more heat, repeat, wait for the heat to transfer deep into the PVC, try again.
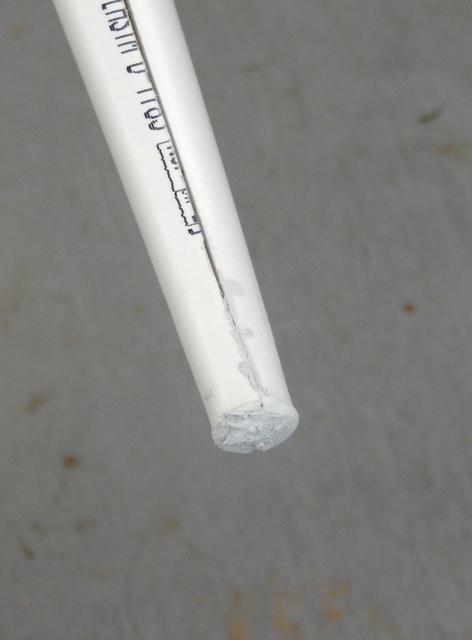
As the wedge closes, look down the limb and make sure you keep the taper straight with the limb. The seam in the taper should run straight down the middle of the limb as you look down it. Hold it closed till the plastic sets. It should look like this when finished:
Now close the wedge on the other limb.
Step 8- Fill the tips with Epoxy. The tips of the limbs are hollow. You can leave them this way, but I prefer to close them up so that when I sand the tips everything looks solid. To do this mix up a bit of the PVC epoxy putty, spread the tip wedge open a bit, and fill both sides of the tip for about 1 inch with the putty. Press the tip together until epoxy squeezes out the end and sides. Do this for both tips.
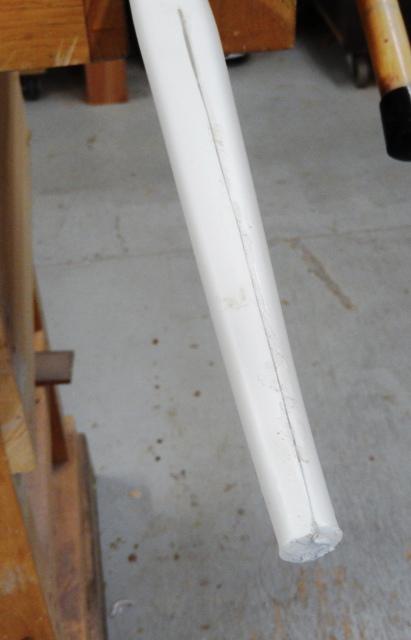
Step 9- Braze the seam with hot glue. Open the seam a little bit so that you can inject hot glue into the entire seam, both back and belly. Once the seam is filled with glue, press the sides together until it set well. You can see the glue spilling over the seam in the following picture:

Step 10- Trim the hot glue. I have used a razor to trim the hot glue in the past. This time, after trimming the hot glue with a razor and taking the pictures, I got onto it with my cabinet scraper. I found the scraper did a really nice job of evening things up.
It’s almost impossible to get perfect alignment, side to side, between the edges of the seam as you glue the taper together. The cabinet scraper really helped to smooth these edges together.
I never know exactly how it’s going to go when I make a bow, PVC or otherwise. The one thing I can count on, though, is that I will encounter something new, or figure out a little trick. I always look forward to finding out what will come up when I make a bow. In this case, it was applying the cabinet scraper to these limb taper seams. Unfortunately, I didn’t think to take a picture after using the scraper.
At this point, I usually take a break. The PVC epoxy needs at least an hour to cure. If I am in no rush, I usually don’t come back to it till the next day.
in reply to: PVC Kids Bow Build-Along #133218Step 1- Cut your pipe to length. I cut my pipe to 58 inches (The taper jig is sized for this length of bow. If you change the bow length, you will need to make adjustments to your taper jig). Doing so yields a bow of approximately 56 inches end-to-end. Maybe a little longer. After making a few bows I discovered that as the PVC is heated, it shrinks. I expect this is because the pipe is drawn during manufacture and cools under stress. When you heat the pipe, it will shrink as the stress is relieved. You will also notice that as you heat the pipe it will wiggle around a bit. Once the pipe is fully heated and soft, it should lay straight in the heating trough.
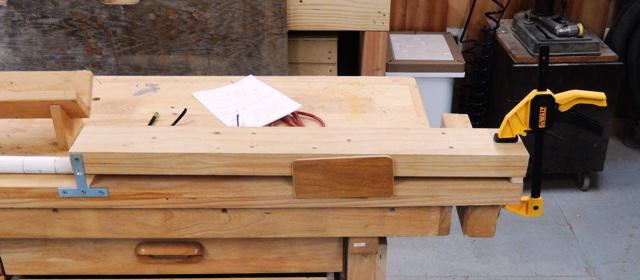
Step 2- Mark the handle area. I put the handle in the middle of the bow, and I make it 4 inches long. I mark all the way around the pipe as you will be rotating it in the heating trough and need to know where to stop with the heat gun.

Note – We will form the bow one limb at a time.
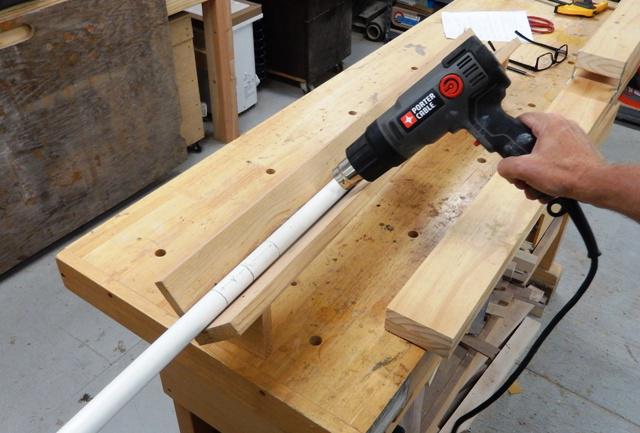
Step 3- To heat the pipe, lay it in the heating trough and slowly rotate it as you move the heat gun from the tip to the handle. It should take about 5 minutes to heat the pipe up. From time to time, press on the pipe to determine if it has become soft. Once the pipe is completely soft, I continue to heat it for another minute or so.
Note – Don’t worry if the pipe doesn’t form right the first time you try it. Just heat it up and try again.
Here is where the fun starts!
Step 4- Raise the taper arm of the jig up so that you can slide the pipe between the T-brackets and up to the end of the jig. The taper arm hinge point is not centered in the wood. This provides a “cam action” which allows the full size pipe to be placed under the taper arm, and then as the taper arm is lowered, the pipe is compressed into the desired taper. As the taper arm is lowered, it will tend to pull the pipe with it. With this in mind, I usually extend the pipe 1/4 inch past the end of the jig so that when the taper arm is all the way down, the pipe is even with the end of the jig.
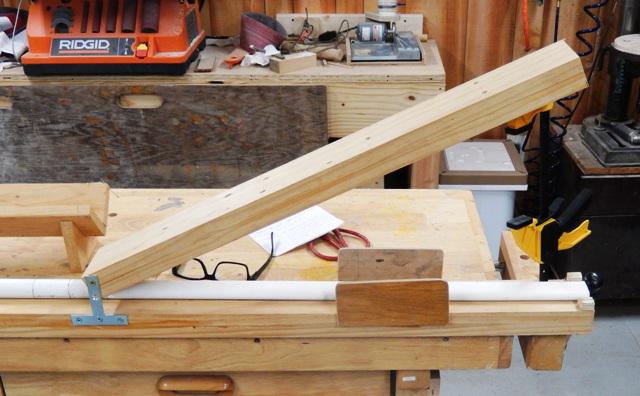
Step 5- Make sure the pipe is laying straight on the taper jig. Press the taper arm down till it stops and clamp. You will have 30 seconds or so before the pipe starts to stiffen, so don’t take too long to get the pipe laying straight. If it gets stiff, no worries, just heat it up again. Leave the clamp on the jig for at least 5 minutes before unclamping.
 in reply to: PVC Kids Bow Build-Along #133217
So let’s get organized…
It’s always fun to jump into things and paint ourselves into the proverbial corner. But once we are stuck there, it doesn’t seem so much fun anymore. Everything we do requires some sort of investment of materials and time commitment. Awareness of these things, before we begin, allows us a greater chance for success. So let’s see what we need…
The jigs you will see in this build-along are made from simple pine boards available at your local wood yard. High quality wood is not required, but selecting straight and true pieces will help you build the best jigs.
In order to get the most rigid jig I could make, I glued 3/4 boards together to make the jig. I expect that if you simply make it from a 2X4, it will suffice.
The pipe used to make the bow is 3/4″ schedule 40 PVC. Using a thinner walled pipe will result in a weaker bow. I encourage you to use schedule 40 pipe.
The first thing you will need to do is gather materials and tools.
For jigs you will need a taper jig, a heating trough, a flattening board, and handle forms. As I mentioned earlier, I will add a PDF to this build-along with plans for making this stuff. A couple hours should be plenty to slap it together.
For tooling, you will need a heat gun, a glue gun, a propane torch, and a few clamps, and some gloves (pipe gets hot!). This does not include the tools you will need to make the jigs, such as a handsaw, screw driver, etc. Here is a picture of the $30.00 heat gun I use:

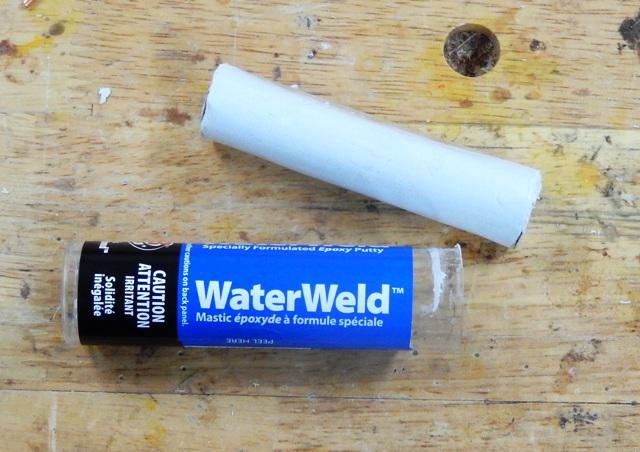
For materials, you will need 3/4″ schedule 40 PVC pipe, twine, PVC epoxy, tape, spray paint, PVC purple primer (optional) and string material. I use B50 to make the strings. Here is a picture of the PVC epoxy I use. It is made by JB Weld and is available at places like home depot and lowes:
Please note, I will give the specifications for the string but I won’t go into detail as to the building of a string. There is plenty of information available for string building out there already.
All right, with all that said, let’s get to work!
in reply to: PVC Kids Bow Build-Along #133216Before I get started, I need to acknowledge and thank Nicholas Tomihama. Nick has a YouTube channel called “Backyard Bowyer” which details how he makes PVC bows. If you look at his channel, you will need to go back a few years to see bow work as his newer efforts have moved into other areas. I bought his book titled Simple PVC Pipe Bows from which I learned most of the basics. If you want to round out your understanding of making these bows, I encourage you to look at his work.
in reply to: PVC Kids Bow Build-Along #133215Copy that. All the pictures I took were high resolution. I cropped them and reduced resolution for the forum. I can provide original pictures as required.
Will you be able to attach a PDF to this thread like we did with the sanding block thread?
in reply to: Gluing nocks #133150That’s a nice knot too Ralph!
Skinner don’t forget that when you draw the bow, the double nock-sets are closer together than when the bow is at brace. So you need to set them so that the arrow nock is loose between them when the bow is at rest. Otherwise one of the nock-sets has to slip as the bow comes to full draw.
in reply to: Gluing nocks #133117I tie my nock-set to the string using the knot described in this video:
To keep it from slipping, I use a smaller string than I use to serve the bow. So I generally serve the string with a 0.21″ diameter serving and tie the nock-set with 0.18″ diameter serving. Sometimes I just use left over string material. I wax the entire length of string before beginning to tie the knot. The wax helps get a tight knot, and seems to help lock the knot to the string.
That said, if it does slip I wrap the serving above the knot with some ordinary button thread and put a dab of titebond glue on it.
in reply to: What ya got goin'? 2 #133090There is nothing better than an afternoon nap! I always count a hunting trip successful if I manage to bag one (or two) 🙂
in reply to: New Backpack Quiver #133011Sorry Jim. But I may redeem myself here soon. I gave away my supply of kids bows/quivers this summer and need to rebuild inventory. To that end I’ve got a few bows and quivers in the works and have been taking pictures as I go. I thought I might do a build along for them that care.
in reply to: My tab is noisy? #133010In the first volume of the video series Masters of the Bare Bow, Roger Rothhaar shows how he shoots bare fingered. He builds up the serving to make it easier on the fingers.
I tried it. Didn’t like it. I do like a Damascus glove, which is the next best thing to bare fingers.
These days though, I shoot a hard hill style glove. Takes some getting used to, but nothing gives as clean a release imo.
in reply to: What ya got goin'? 2 #132991First acorns!!! Seems early, but there were some real beauties under two trees which were on opposite sides of the mountain. One on the east, one on the west. Both dropping a bunch, and most eaten by deer. Nice to see, except by the time deer season gets here, they will be tired of acorns already.
Had a spike stroll through my shooting range the other morning. He couldn’t care less that I was standing there. I had the wind in my favor, and so I got to watch him browse through for 5 minutes or so. When he was 60 yards away, I started shooting again. Didn’t seem to bother him one bit.
in reply to: New Backpack Quiver #132908The hole in the side for retrieving the arrow. I drop them in the top, and pull from the side. It may be hard to tell in the picture, but pulling an arrow from the top would be hard on the old shoulders.
No glue used in the quiver, just stitching. No wet forming, just cut and sew.
in reply to: Draw Weight #132496It is possible that your brace height has decreased.
Might want to check that. If your brace height has decreased it would explain the low draw weight and the stiff arrow behavior.
in reply to: New Backpack Quiver #132495The long and short of it is that, like usual, no elk were harmed in the making of that hunt. But we did see more elk on this trip than I’ve seen in all the trips of the last 10 years or so combined. It did seem like, for a while, I might have a run it with a cow, but then a rifle hunter popped out at the bottom of the drainage and the herd shied away.
This was our first time in this spot and all we could get was over-the-counter tags for the 2nd gun season. Tough stuff for a bow hunter. If it were not for my upcoming Appalachian Trail hike, I would be making plans for a hunt there this fall during the warmer bow season. I decided to hold off on any trips between now and when we leave for the trail in March (well all but one trip to VA for deer this fall) as its just to hard to keep things up being gone too much. Need to have the place in tip-top shape before leaving so the wife doesn’t have to work too hard holding down the fort.
It snowed on us for 4 days straight on this trip. This was my first thunder snow storm. Crazy to see lightening and snow together. The following picture is from camp before the first thunder-snow.
 in reply to: Looking for ideas for a kids archery class #132422
Make PVC bows. Easy, fun, and cheap. Can be done with just hand tools, except for heat gun. There is a thread on here somewhere showing some bows I made with my nephews at the beach a few years ago… Maybe called “beach bows” or something.
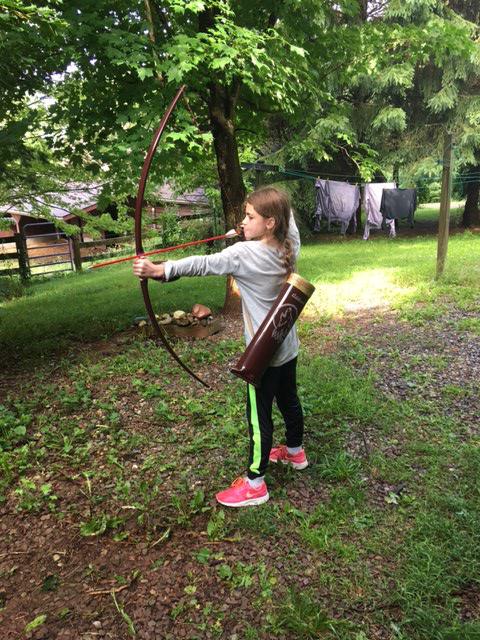
Kids seem way more interested and committed when they are shooting a real bow they made. Dang lot o fun.
-
AuthorPosts