
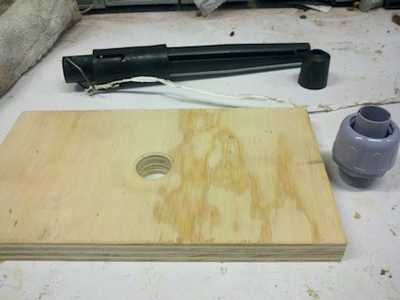
I have tried several other fletching jigs, but for me, the Arizona EZ Fletch (AZ) is king. I’d like to share a few tips that make it even easier to use. The first picture shows everything you’ll need for the following tips.
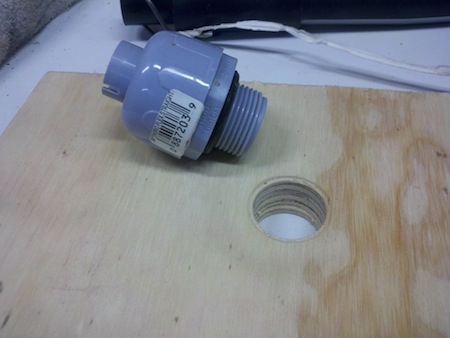 I got very frustrated when the AZ would shift on me at a critical moment. I searched my workshop for something to hold it steady and came up with a ready-made piece of electrical fitting that works perfectly. I made a stand to hold the AZ while I insert the arrow and the fletching to be installed. The base is a piece of 3/4″ plywood, and I drilled a 1″ diameter hole near the center. Next, I took an electrical conduit reducer (Quick Set® Liquid Tight Connector) that is designed to connect 1/2″ conduit to an electrical box. The 1″ hole in the plywood allows me to screw the threaded end of the electrical fitting into the wood by hand with enough resistance to hold it tightly. I left the nut on, but it serves no purpose.
Savvy electricians will notice I took my hacksaw and cut a 1/8″ wide notch in the sides of the electrical fitting. This allows the wire handle on the AZ to slide into the slots, which keeps the AZ from turning when I twist the bottom spring-loaded section up and down. Follow the directions for fletching the arrow, and leave the shaft upright until the glue dries. I used to just lean arrows against a wall, but upright works much better.
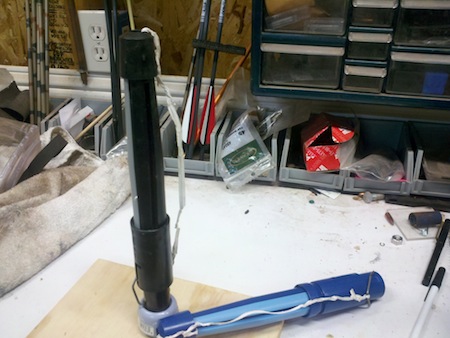 The second tip concerns storing the AZ while not in use. I find it almost too easy to lose the cap that slides over the arrow, so I use a long piece of twist tie wire. Attach it to the wire handle at the bottom of the AZ and slide it through the center hole of the cap. Place the cap on top of the fletching arms and wrap the twist wire over the cap and back around itself below the bottom of the cap. I’ve never lost one yet with this method.
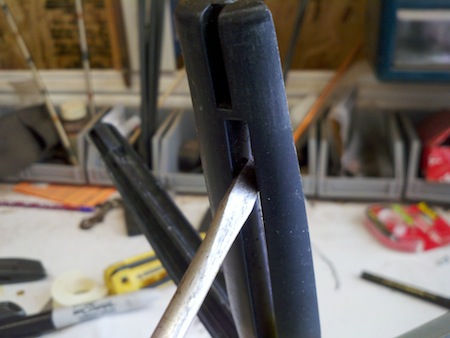 The third tip explains replacing a single feather. If I need to replace two feathers, I usually just replace all three. Vanes are not as difficult, so this is mainly for feathers. Place the damaged arrow into the AZ and turn it to align the two good feathers with the arms. Then, carefully feed the feathers–bottom first–into the arms to align the arrow. The tough part is actually getting the feather in the arm because mine are for right helical. Straight fletching may not be as difficult. To make it a lot easier, insert a blunt blade about 1/4″ wide at the tip. I use a flathead screwdriver, as shown. Insert the tip about 1/2″ below the top of the slot in the arm, and twist it about 90 degrees. This opens the slot enough to slip the arm over one of the good feathers. Smooth the base and repeat the process with the other good feather. Align the replacement feather in the remaining third slot at the same height as the other two, apply glue to the base, and then fletch as usual.


This is the only fletcher I use. I use fletch tape also and when done I put a little drop of glue on the front of feathers where they meet the shaft.
I absolutely love the Arizona fletcher. I have other big name fletching jigs, but I use the Arizona more than any of them. I like it’s simplicity and speed. I use the left wing helical and it puts just the right amount for me. Thank you for tips, I am a huge Arizona EZ fletch fan!
I replace one fletch by putting the arrow in like normal, put a feather in the slot that needs replacing, glue fletch and fold it into place, but I do not engage the spring, I just clamp that section on the arrow with tape in place of the cap.