
Forum Replies Created
-
AuthorPosts
-
in reply to: Sharpening single bevel heads ? #60951
sharpster wrote: Bullseye,
I’ll take a stab at it…Sharpening is as much about understanding the process as it is about technique. Sharpening single bevels can actually be easier than sharpening double bevels once you understand what needs to be done and, in what order to do it.
Start by flattening the back (unbeveled) side of the blade. This is usually a pretty simple step. Just hit the back with a file or stone a couple times to remove any high spots or burrs. This is step one and we do it so that later in the process when we raise a burr, we know for certain it’s a direct result of our work on the bevel side and not something that may have been there all along.
Now we need to raise a burr by working a very coarse stone or if need be, even a file on the bevel side of the BHD. As with sharpening any blade, consistent angle is fairly critical at this point but it’s easier to hold the angle with most single bevels because the bevel is big and wide. You can raise a burr by working the blade any direction you like; Into the edge, away from the edge, lengthwise along the edge, whatever is most comfortable for you. When free-handing, I like to use Ed’s “push-pull” technique. I’ll mount the BHD on a fairly long section of shaft, clamp the file or stone down to the edge of a bench or table and use my right hand to hold the BHD and maintain the angle while my left hand provides the push/pull motion. Actually the left hand just kind helps hold everything in place and the motion is more of a forwards/backwards “rocking” from the waist, moving the BHD and shaft lengthwise forwards/backwards along the edge of the stone or file.
Keep this up with the coarsest stone you have until you have raised a burr that runs continuously along the edge from tip to heel. You don’t need to have a huge heavy burr, but you do need to have a burr. When you’ve gone far enough the edge will feel ragged when you lightly run your thumb or fingers along the edge. If it doesn’t have that ragged feel, then keep going with the coarse stone until it does.
Once you’ve got the burr raised, don’t touch it…yet. Now repeat the process with as many finer grits as you like. You don’t need to spend a whole lot of time with each individual grit because at this point you’re only polishing and refining the edge created with the coarse stone, and each successive grit is only polishing out the scratches left by the previous grit.
Now the last step is to remove the burr and reveal the blazing edge it’s hiding…
As I said you can move the blade any direction you like to raise the burr and polish the bevel but when it comes time to remove the burr, that must be done using into the edge strokes to prevent chasing the burr back and forth from one side of the blade to the other all day. So now we slow down and are more deliberate. Place the BHD bevel side up near one end of the stone with both the cutting edge and the ferrule on the stone. This will stabilize the head and serve as an angle guide as you remove the burr from the blade. Now using a slicing motion, move the head across the stone straight into the cutting edge. This will capture and remove the burr and it’s a very critical step. It may take several passes to completely remove the burr depending on how heavy it is but it’s important to do just the bare minimum required to clear it. When the burr is gone you’ll have a very sharp blade. Check your sharpness level after every pass. Be careful here because if you go too far, you can end up creating another burr on the bevel side. So again, be careful and do only the bare minimum required to remove the burr. Then just strop the BHD using alternating passes, first bevel side then unbeveled side, back and forth with light pressure. You can do this on leather or my personal favorite, plain brown corrugated cardboard. (Stropping is always backward, “away from the edge” passes). After this you should have something similar to a straight razor in your hand…Keep it away from your bowstring! Hope this helps,
Ron
This is the best info I found on sharpening single bevels. I used a file to put a bevel on some old Journeyman broad heads that I had. I had no troubled raising a burr with the file, so I moved to a coarse diamond stone. The burr remained, so I went to a fine diamond stone, and the burr remained. I couldn’t remove the burr and you could easily see it on the edge of the broad head and you could bend it over with your finger.
I couldn’t get rid of the burr so I started searching posts on here and found this one. Great advice and a great method if you are using flat Arkansas or diamond stones. The stropping with cardboard also worked great. Missing a lot of hair off of my left arm now.
Put a little 3 in 1 oil on the edges, loaded them in the Cat Quiver and I am ready to go. Thanks to Sharpster for providing this info. Tuffheads will be the broadhead of choice for next year.
in reply to: aluminum arrows #39457I am shooting 2016’s out of a 45 lb Kodiak Magnum. Mine are cut at 27.5″ and I have been shooting 125 grain heads. I do not really like the way this combo shoots and I find the arrows a little stiff and shooting to the left of where I am looking.
So I tried some 200 grain heads on them and they fly much better and quiet the bow much better. So now it is the 2016’s with 200 grain heads and a 33 grain insert. For broadheads I am going to shoot 145 grain Journeymen’s, with a 34 grain adapter and 33 grain insert. Hoping these shoot as well as the target points.
I think the 2016’s would work well in your bow, but you should follow the tuning guide on Tuffheads web page to get the correct arrow length for your bow, draw length, and head selection (http://www.tuffhead.com/education/tuning%20the%20efoc%20shaft.html)
in reply to: Check this guy out! #20954That is amazing, but he can’t throw a ball!
in reply to: My condolences Don #62632My condolences on your loss. What wonderful contribution to the benefit of mankind.
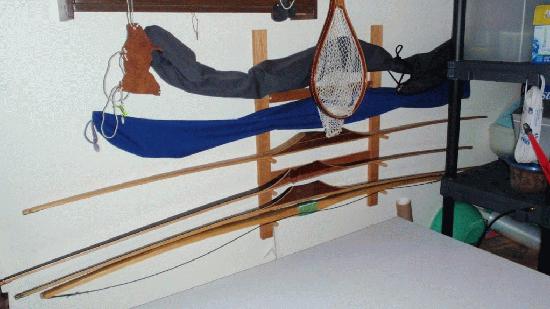
in reply to: Storing and/or Displaying Your Bows #31666I have a couple ways to store my bows. First, is a rack I built about twenty years ago. Just a couple pieces of virola pine with some pegs drilled and mounted in it. My two hunting recurves are on top, still in their bow cases.
My second storage area is a little more cluttered and is simply the old overhead storage area. You have to make space where you find it.
 in reply to: Chek-Mate bows???? #31644
I cannot speak to their recent history as I have not purchased a bow of theirs for years. I have a three piece take down with 56 lb and 46 lb limbs and i love the bow. But, I purchased mine back in 1987 and have been using it since. Great bows from my experience.
in reply to: Cat Quiver #21519I have to say I love my Cat Quiver III. Lots of room in the day pack, good protection for feathers and broadheads, holds lots of arrows and is easy to hang while in a treestand. I have hunted with bow, back and side quivers, but prefer the Cat Quiver.
Like most subjects Tradbow, it comes down to personal preference.
in reply to: Think what you thought you saw #21485Nice deer, great pics and a happy ending. Glad that your son got him the next day.
in reply to: Amazing: My son's new Java Man Archery Helms Deep #63867Beautiful!!
in reply to: Cold Weather Gloves #61545paleoman wrote: Maybe one of those muff type jobs if I’m using the right term? The fleece lined tube you put your hands in while at rest….I never used one but a friend has and seemed to like it at the time. It could probably be secured so it wouldn’t swing into your string.
I use one of these muffs with a handwarmer inside it. In the early season my string fingers are bare (I shoot with a tab), and I use one of those fingerless gloves on my bow hand.
Last weekend temps were -2 celsius (about 28 F) with a windchill of -12 celsius (about 10 F). I used a wool glove on my string hand inside the muff with a handwarmer and had no problem with the cold on my fingers. The rest of me complained a little.
The muff doesn’t get in the way of drawing the bow and keeps your hands warm. When still hunting, it is strapped around my waist and I don’t put my hands in it. Walking generates enough heat to keep my gloved hand warm.
in reply to: Bow Building #30119I made bows for a few years back in the 90’s before going primitive. The design of a limb can vary greatly depending on the amount of reflex or deflect you put into your design. I found a lot of the bow draw weight came from the glass that was used to build it with. For example, I can’t remember but I think if you go from .040 to 050 glas you gain about ten pounds of draw weight with the same wood lams in the limbs. I would think you would need two wood lams in the lower limb and two for the upper limb with .040 glas to come out between 40 and 50 lb draw weight. But that is a guess. Bingham can probably help you out and get you close.
I used to measure the thickness of the limbs (total all glas and wood lams) just above the riser and use this as a guide to increasing or decreasing weight in the next bow I built.
Using this thickness you can plot a graph of draw weight versus limb thickness and extrapolate to design a precise draw weight. It is a pretty linear design, that is to say the graph is a straight line. But you need two bows of different thicknesses to make the graph and they have to come off the same form.
Not sure if this helps or not but it is what I recall.
in reply to: Lost Season, Maybe Worse #26053donthomas wrote: Listen to my doctor? Ah, they’re all idiots. But don’t worry–I’ve already learned how to drink beer with my left hand. Don
Thought you would get that. You know what they say about lawyers who have themselves for clients. I know from first hand experience that it works that way for engineers. But engineers could find a way to drink beer with no hands.
in reply to: Lost Season, Maybe Worse #25475Don, sorry to learn of your injury. I do hope your surgery and recovery go smoothly and quickly. Maybe just my own selfishness, but there could be a benefit to your many readers in that we might get an extra article in TB to read, or with the down time you might produce another book. Love all your stuff. Keep up the good work, and in your recovery listen to your doctor.
in reply to: Garbaging for Bears #25454This is a difficult topic to find the correct position to stand on. Baiting is traditional in some areas and completely prohibited in others. Some areas lend themselves well to spot and stalk hunting and other areas do not, so different tactics have been developed. Approximately three years ago, the only way to legally hunt bears in my home province was at a registered bait site. Imagine, you could not legally spot and stalk. That law has changed, but likely contributed to an increase in the use, and popularity, of baits.
I think all hunting comes down to some form of baiting. For whitetails, we have all learned to position ourselves between bedding and feeding areas. We don’t put the food out, but we know where it is, where the deer travel and where to position our selves. That’s not baiting, but it is taking advantage of a deers stomach to increase our odds.
What about calling a moose? Now we are taking advantage of hormones to increase our odds. Should moose calling be banned because it definitely gives us a great advantage in getting a moose within range.
First, do what is legal within your area. Second, do what your own ethics tell you is correct for your hunting situation.
Some around here would suggest you take her for a ride over a bumpy road. I am not sure that will speed up the process but it may give you a laugh while you wait.
Enjoy them while they are young. The years go by too fast and the first thing your sitting there thinking “its been a while since I heard from him/her”. They will be moved out before you know it.
-
AuthorPosts