
Forum Replies Created
-
AuthorPosts
-
in reply to: Sealing Some Surewood shafts #19646
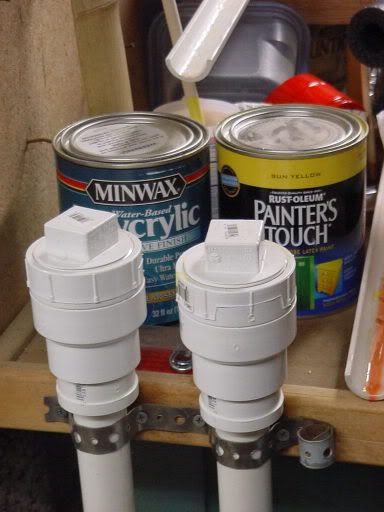
Tucson, I use Minwax Polycrylic to seal my shafts. You don’t really need a dip tube to apply sealer. You can dip a rag in it and wipe it on in two or three coats, wiping it with steel wool between coats.
I made my own dip tubes out of 1″ pvc. I glued a cap on one end and on the other I glued on a 1″ to 2″ threaded reducer. After I’m done I just screw on a cap. Keep in mind that some solvent based finished will eat up the pvc tube. If you decide to make some out of pvc, get the reducers with male threads. You won’t have to worry about getting paint in the treads as much.
I usually just let them drip dry but I have some thin strips of rubber that I punched a hole in and just hold it on the top of the tube with my fingers and let it squeegee the poly back into the tube,
Long one for full length shafts. Short one for cresting paint.
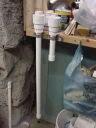
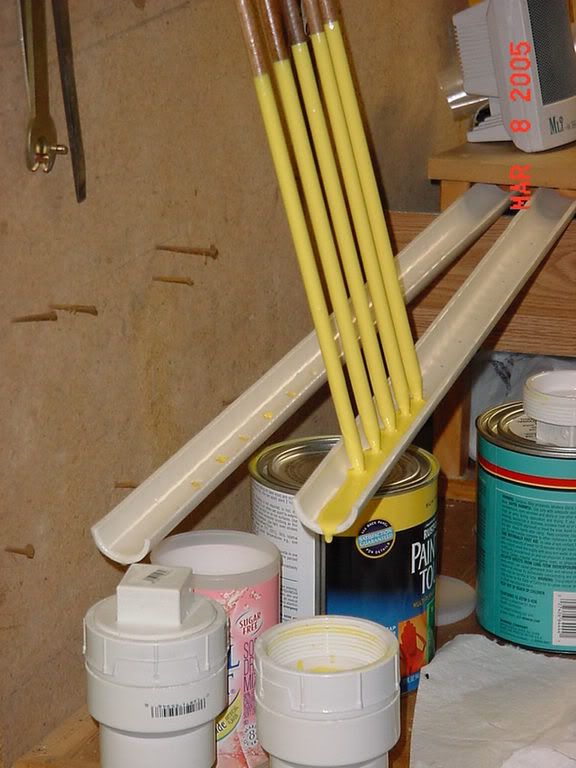
Cresting paint. The pvc gutter drips back into the tube.
Dennis
in reply to: Starting Some New Ones #17477Did a little more yesterday evening and tonight. I worked late both days and didn’t get to do too much. I did get the limbs and riser window cut out and the edges sanded down yesterday evening. I always save back a couple of dull bandsaw blades for this step. When I get done cutting out a bow the blade is trash.
Putting the ‘hurts’ to a blade.

Tonight I am gluing on the riser and tip overlays. Here is the Walnut riser overlay.

And the tip overlays. I used Hickory with a piece of Mesquite on top.

It is now back in the hotbox at a little cooler setting than the last time. Maybe tomorrow I can get the overlays trimmed up and cut some nock grooves.
More later………………
in reply to: Starting Some New Ones #15140I got all the glue boogers sanded off and got everything squared up again. A 36 grit sanding belt makes it a little easier to do this. I took the bow back into the basement and peeled the tape to see what it looks like and to check for any flaws before continuing on.
Leopardwood is purty.

I found one small air bubble on the back just below the center of the riser. I am not concerned with this because there will be no flexing at this point and it will be covered with a Walnut overlay. I then re-taped the limbs and marked the centerline. I use a laser level for this step. I have the laser with a magnetic base attached to a heating duct above my work area (it has been hanging there for about four years now). Simplest way I have found yet. These are old photos that it.


After marking the center I just measure and mark the cut lines on the limbs. I decided to go with a 66″ length (64″ N-N) on this one.

Riser is marked for the shelf.

If I have time after work tomorrow I will do some bandsaw work. To be continued……………………
Dennis
in reply to: Built my first quiver! #15043You did a good job on that one. Nice looking quiver.
Dennis
in reply to: Starting Some New Ones #14711M. Miller
I had always wanted to learn to make a bow and had read lots of articles and books on the subject but I wanted to see it first hand. I did that by attending the first Oklahoma Selfbow Jamboree in 2005. Now it is an event that I won’t miss. After I got home my first bow was a Bamboo backed Osage D/R that I shot for about three years and had to retire it because the bottom limb was starting to fret. It is still my favorite bow. That got the addiction started.
I started out with glass bows by making a bow from a Bingham’s kit. The instruction tape was very good on the steps you take in the process. After that I started making my own forms and riser styles.
Good luck on your endeavors and if you get a chance to attend an event like OJAM or MOJAM do it. Ask lots of questions because everyone is glad to help you get started.
Dennis
in reply to: Starting Some New Ones #14628You are right Steve. I have used this form to make bows using three different styles of risers. I hadn’t put the blocks in before I took that picture.
Here is what it looks like fresh out of the hotbox. Lots of small pops and creaks as I deflate the hose.

Fresh out of the form. It looks kinda like a bow.

I always wonder if I am leaving enough glue on the lams when I lay up a bow. I think I can quit worrying about that. I’ve got lots of glue boogers to sand off every time I make a bow.

We will see what it looks like after a trip to the sander this afternoon.
To be continued…………..
in reply to: Starting Some New Ones #14067Had some free time today and decided to head for the basement and do some more work on a bow. I decided to go with Leopardwood on this one with a Hickory core.
I already have the riser done so I made a lap joint on the laminations and glued them together.

While the glue was drying I covered the finished side of the fiberglass with painters tape to keep the glue off.

I then put everything in the hot box to warm up for a couple of hours.
After everything was warmed up good I started the lay-up process. I start out mixing the Smooth-On.

Then I get everything out of the hotbox and lay it out in the order it will go on the form. I lay out a strip of wax paper on the table to keep from getting glue all over it.

Then I start smearing glue and adding layers. I don’t wear rubber gloves. I have more trouble with them than I do without. I just keep a couple of rags lightly soaked with alcohol handy and wipe my fingers off after each layer.

Here the riser is in place and held with a clamp and the rest of the laminations are in place and ready to be taped down. I don’t have any pictures of taping the layers down. My daughter helped me with that step and we were pretty busy at the time.

Here the air hose is in place and the form is bolted together. I just slowly add 80#’s of air pressure to the hose as I keep a constant check on everything to make sure nothing moves.

It is now in the hotbox with the timer set to shut off in about six more hours. Tomorrow morning I will see what I have. Not a bad way to spend the afternoon.
Dennis
in reply to: Some Old Photos #11600Those are some great pictures Bear Paw.
Dennis
in reply to: Dying Feathers #10555Larry,
I haven’t noticed them getting much lighter after drying.
Dennis
in reply to: Computer Backgrounds….??? #63621Here is an easier way to make a background withoout any programs to mess with.
If you just want one picture for your wallpaper just load one of your own pictures onto your computer and bring it up on screen. Right click anywhere on the picture and click “Set as Desktop Background” in the pop up box. Presto……..Instant Wallpaper. When you want another picture for a background just repeat the process.
Dennis
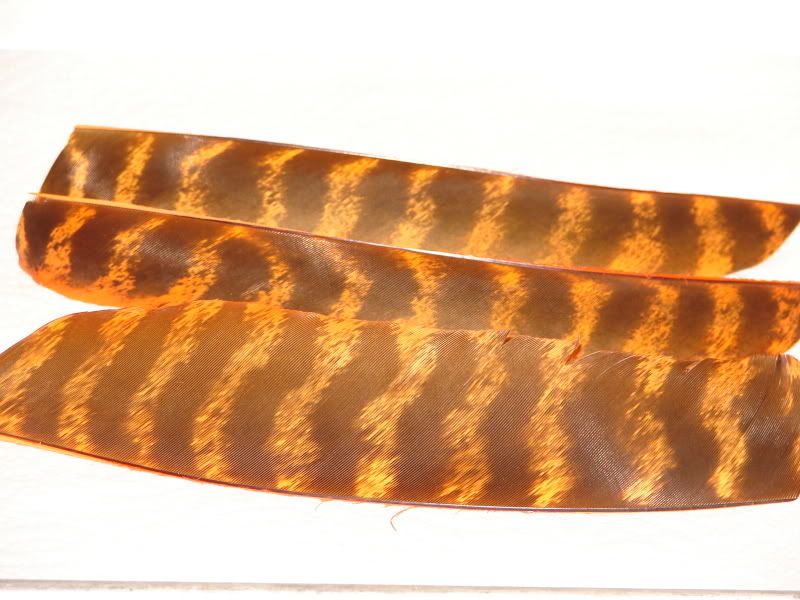
in reply to: Dying Feathers #63227I’m not picky, I use all the primary and secondary feathers that are long and wide enough to grind. Some of the secondaries are stiffer and I make sure to use them for the cock feather.
I use the whole feather. I was using 5″ feathers and could get two fletches from the longer wing feathers. I started using 4 1/2″ and get two from almost all of them now. I even use the tail feathers and can get three or four from them.
I use a feather burner so I can adjust the length and shape to anything I want.
Dennis
in reply to: Computer Backgrounds….??? #63218The first picture is on my background today. It is in the Webshots program I use.
I found these two fawns next to one of our pump structures by the Neosho River the day after the 2007 flood here. It is hard to tell, but where they are laying was covered by 12′ of water the morning before and the river stretched almost two miles to the east.
I posted these pictures on some forums back then and had a lot of people ask to use them for wallpaper.


I carry my camera with me 99% of the time because you never know what might show up and want it’s picture taken.

This feller visited me at my booth at McAlester.
OK, that’s enough.
in reply to: Dying Feathers #62863Robin, I’d be happy for you to use it as a tip.
Duncan, I have a feather grinder I made that is simnilar to the one Dean Torges has on his web page. I made mine a stand alone unit instead of one used on a drill press. I will post a ‘Grind-along’ someday.
Orange looks good too.


Dennis
in reply to: Computer Backgrounds….??? #62158Go to
http://www.webshots.com/page/apps?app=footer%20&vhost=www
I’ve been using this program for several years. It allows you to load your own photos and it changes your background wallpaper on a schedule you set plus it runs through your pictures in a screensaver mode too.
You can also use Webshots to post pictures on forums too.
Dennis
in reply to: Lets Do a Build-along #52480This is a newer version of my lathe. Mine doesn’t have the disk sander.
http://www.harborfreight.com/14-inch-x-40-inch-lathe-with-6-inch-sander-45276.html
Dennis
-
AuthorPosts