
Home › Forums › Bows and Equipment › Curly Hickory Longbow
-
AuthorPosts
-
-
Clay Hayes mentioned on another thread about getting some build-alongs started here. Just thought I’d prime the pot and show one I built last year.
This one started out when I won some laminations in a give-away on one of the other trad forums. I chose a Maple core and Curly Hickory laminations. After some discussion on bow forms and lam thickness I set out to make my form and ordered some clear glass and glue.[/size]
The ingredients:
4 each parallel Maple laminations 1-1/2″X.045″X36″
4 each parallel Curly Hickory laminations 1-1/2″X.065″X36″
2 each Gordon E-tough clear glass 1-1/2″X.050″X72″
1-1/2″X1-1/2″X24 Hickory, Osage, & Black Walnut for the riser
Smooth-On epoxyI wanted a hybrid longbow 1-1/2″ wide and started by buying a 3/4″ sheet of plywood. I cut it in two lengthwise and glued and screwed the two halves together.
When the glue had dried I squared up the panel on the table saw and marked out some reference lines for deflex and reflex. This was going to be a guessing game. I ripped a 1/4″ thick slice from a 2X4 board and using that and brads started laying out the r/d on the panel. I really wish I had written down the measurements that I settled on but I didn’t.[/size]
I built the form using this method which is about as accurate as you can get. You want the form to be square. Kenny has it laid out and easy to understand.
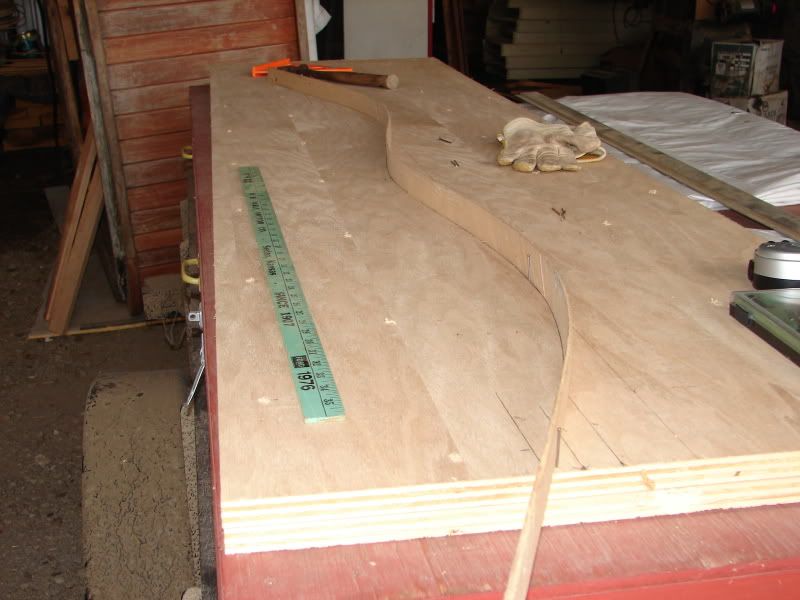
http://kennyscustomarchery.com/Bow_forms.htmlWith the form finished I started the riser. I took a piece of Osage and a piece of Hickory, each measuring 1-1/2″X1-1/2″x24″, and sandwiched a piece of 1/4″ thick Black Walnut between them and glued them together with Smooth-On. After sanding it smooth I marked out the riser on the blank. You can see the form in the background.
I cut out the riser and glued everything together. I realized later that I did not get a picture of the cut out riser and there are no pictures of the glue-up. I was the only one home and I can’t make myself pick up a $600+ camera when I have epoxy on my hands.:shock:
Into the hot box.

For anyone thinking about building a hotbox I would suggest one like I built. I made the box from 1/2″ thick foil backed foam insulation with 3/4″X3/4″ wood rails in the corners. I have four bulbs in it, two 60W and two 100W and can get 160* plus for heat. It is very lightweight and easy to move around.
More to come………
Dennis
-
I have my hotbox hooked to a timer and do my gluing in the evening. I set the timer for around six hours and leave it overnight. I took the bow out of the form the next morning and looked it over.

The Hickory turned out real purty.

Next, I checked the tiller, which turned out great, no problems with that at all, and then I marked and cut out the riser and limb profiles (no pics of that either:roll:).
I decided to use Black Walnut and Hickory for the tip overlays and started working on that.


I had to sand down the belly a tad because the lams had slipped just a bit on the riser. Nothing bad, just needed a little elbow grease.

I decided to use some Ipe for the grip overlay and cut a thin piece and glued it on. I sanded down the bottom end of it and was real pleased with the way it looked.

I worked my way to the top end and discovered air bubbles underneath. I sanded quite a bit off and it just would not go away. In this picture I had sanded about 3/4″ of it off and it just kept getting worse. I finally sanded the whole Ipe overlay off and glued on another one being a lot more careful with the glue.

More coming……..
Dennis
-
OK. I got the second try grip overlay done and this one turned out fine. One last check on the tiller and time to test shoot.
I grabbed a few arrows and set out went in search of my quarry, the ‘Roundus Haybalus’. Shhh…There’s one now.

I am wishing I had made the riser a couple of inches shorter but it shoots great.

Time for a finish coat. I fut four coats of True-Oil on it and really needed to use a sealer, possibly super-glue, on the Ipe overlay. It remained tacky for quite some time.


More……
Dennis
-
Finished specs….
64″ 54#@28″ I was hoping for a weight somewhere around 45-50#’s but I’m not complaining at all.
Profiles….


I shot and tuned this bow a bunch for two weeks and then decided to take it for a walk in the woods. It was late December and there were five days left of deer season here so I decided to give ‘Curly’ a field trial. I gave up tree stands a few years back and have been a ground hunter exclusively and I knew of a Cottonwood blowdown that was near a travel route and had that feeling of ‘tonight’s the night’ so I still hunted to it and waited.
About 45 minutes before dark I had not one, but seven deer within 30 yards of me. Just before dark I finally had the opportunity to draw back undetected and send a Bamboo shaft into a doe just ten yards away.


I feel that this hunt was a super achievement in several ways. I had harvested a deer with the first arrow shot on the first hunt of my newly made bow. Secondly, I had done that from ground level surrounded closely by 14 eyes ever alert to danger. It is a hunt I will not soon forget.
Dennis
-
Very nice Dennis. There’s nothing like taking an animal with a bow you’ve made, especialy from the ground. Whitetails are a whole nother ballgame from the ground.
You did a nice job on the bow. I’ve never built any laminated bows, so that was informative.
Congrats!
ch
-
UPDATE
My nephew stopped by a couple of weeks ago to get some arrows for his BBO I had made for him. While we were doing some shooting in the back yard I noticed a small crack in the belly glass on the top limb. I unstrung the bow and planned on getting some pictures of it. A week later I got the bow out to take some pictures of the crack and this is what I found.:shock:
Top limb

Bottom limb

Everyone seems to think the laminations drew moisture and swelled some causing the breaks. Maybe so. I don’t know how it could draw moisture through 5 coats of True-Oil though. There are several more cracks starting to form on both limbs and just on the belly so far.
I had planned on starting another bow after the first of the year but this event set that into motion a little earlier than planned. My nephew wants to help on this one. I think I may have created another bow junkie.
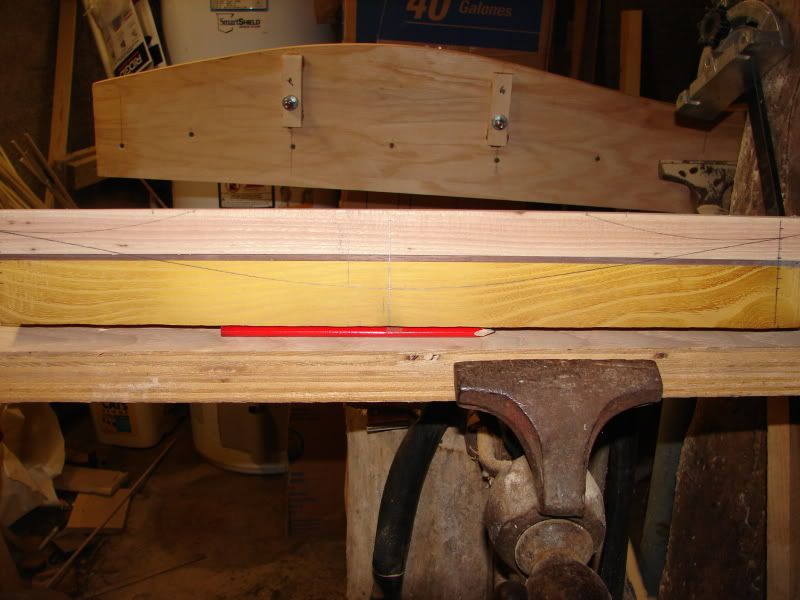
A little preview of the ingredients.
Hickory core. Black Walnut Lams. Osage riser.

Riser dry run. There will be one more Walnut accent strip.

Dennis
-
Sorry to see the cracks,…but it may not be all that bad. I have read that cracks that run the length of the glass do not affect the integrity of the bow. I have a bow that has a crack up the limb and I have continued to shoot it without further problem.
I think the glass with “scrim” is supposed to alleviate the problem of longitudinal cracks. I haven’t had the problem in bows I made using the scrim glass.
I think bows made in the winter months are more prone to the cracking due to the expansion problem. I read in one of Fred Bear’s biographies that he had a bunch of bows do this back in the 60’s due to the really dry cold winter they had that year. He replaced all the bows and it nearly made him bankrupt.
You are in good company 😳
-
Great pics and even better info!!! Thanks alot, and this will sure help in my projects to come!
-
-
AuthorPosts
- You must be logged in to reply to this topic.