
Home › Forums › Bows and Equipment › My new bow for this year (added chrono numbers)
-
AuthorPosts
-
-
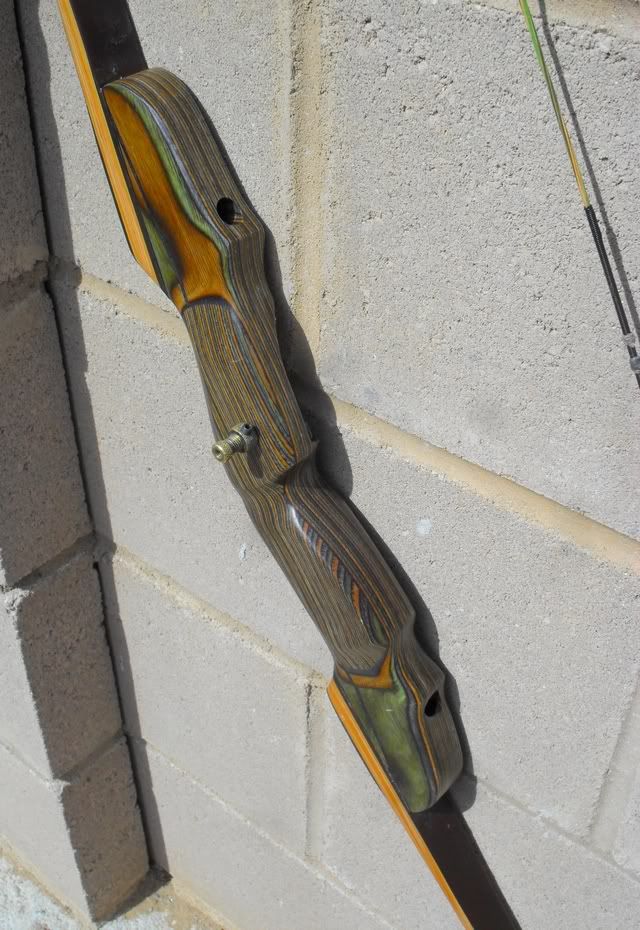
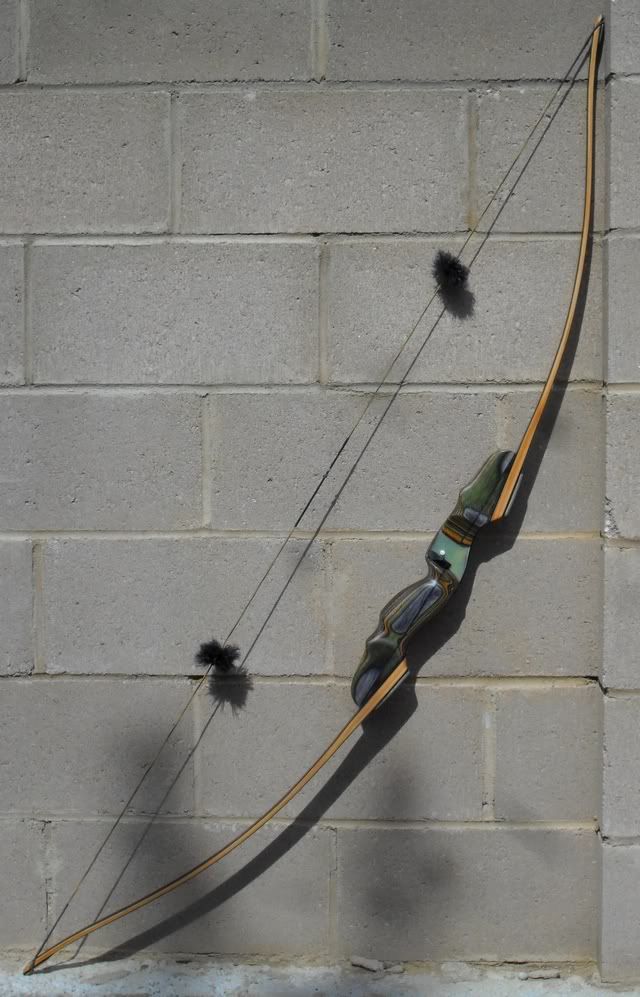
I like how it turned out. She ended up 63″ nock to nock and 56# at 28″. The limbs are 1 1/18″ wide at the riser. I used bison rib for the tip and wedge overlays. I need to learn scrimshaw and do those overlays. I made the riser a bit beefy to keep it stiff. I layed up 10 layers of fiberglass cloth and a piece of linen phenolic in the riser to beef it up. I added some more wood on the opposite side of the window so I could cut the window out 1/8″ past center. I also cut the shelf down flat so I could use a flipper type rest and a cushion plunger. It shoots vanes well. Seems to shoot my 585 grain 31% foc arrows like darts. I’m still on the fence about the black glass on the back of the bow. I didn’t have a long enough piece brown glass to do the back of the riser but I have a couple of pieces I may splice together and then cover the splice with some more bone.
Now just have to get my bear permit and see what she’ll do.


-
When I first looked at the bow I thought “something ain’t right”.:?
Then it hit me,,, no limb bolts. Took a couple looks to catch it. At first it looked alittle strange. However, the more I look the better I like it.:D
Troy
-
I think the black glass looks fine!
Nice Job!
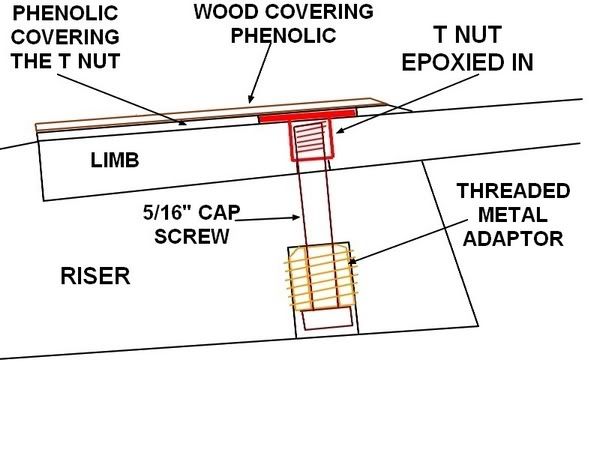
I have seen pictures of many bows made as you have done with the limb bolts coming in from the riser side. But I never figured out how that works. Do you glue the nut into the limb under the overlay?
-
Good looking bow.
-
I use this t-nut in the limb

And this is a rough sketch showing how I did it on a reverse mounted limb. I do the drilling while the riser is still in a block with only the limb pads cut. I use a drilling guide to center the hole starting with a 5/16″ from the pad side the turn it over and use a larger bit to drill in from the belly side. I use a brass adapter that has 5/16″ threads in the inside and a course thread on the outside. the large hole is smaller than the outside diameter of the adapter. I put a layer of smoothon in the hole than start screwing the adapter in. I screw in a 5/16″ bolt from the pad side as I screw the adapter in so that its straight. Once the epoxy is cured I drill out the adapter with a 5/16″ bit to get a snug fit on the limb bolt. Have thought about making a fancy plug for the holes but never get around to it.
-
Thanks to a friend I got to shoot this through a chronograph. The bow ends up at 55# at 28″ with a 7 1/4″ brace height. Shot with fingers at my 28″ draw.
588 gr arrow-10.7 gr/lb = 174 fps
512 gr arrow-9.3 gr/lb = 184 fps
430 gr arrow-7.8 gr/lb = 202 fps
Going to try different brace heights to see how that affects things. I’m having trouble shooting over everything with the 588 gr arrow so I’m putting together a 650 +/- grain arrow to see if that matches my mental computer.
-
-
AuthorPosts
- You must be logged in to reply to this topic.